Booting MOOS on real hardware
Now that you've built MOOS in Visual Studio 2022, we can now proceed to boot MOOS on real hardware and get a big boost in performance rather than running everything on a virtual machine. Of course there may be some limitations to this mainly driver related issues, for example USB Drivers, Graphical Glitches, Kernel Panics and etc...
Tested Hardware
| Computer/Laptop Name | Status for working or failure | Date Passed |
|---|---|---|
| Dell Optiplex 390 | Worked | Fri, 14th October |
| Lenovo ThinkStation P150 | Worked | Thu, 13th October |
| Dell Optiplex 3010 | Worked | Thu, 13th October |
| Asus X515 Laptop | Failed to boot(BIOS Related Issues) | Thu, 13th October |
| HP 11-ak0027na Laptop | Failed to boot(GRUB denied to display anything on boot) | Fri, 14th October |
| ACER Aspire 1 Laptop | Failed to boot(BIOS Related Issues) | Fri, 14th October |
| Dell Optiplex GX520 | Worked | Thu, 13th October |
Guide
Step 1
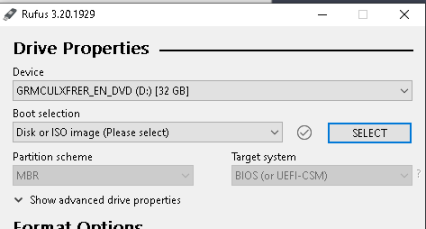
To start testing MOOS on real hardware we will need to flash the MOOS iso or image onto any USB with at least 4GB or over, we advise getting something like this. If you have a USB already, we can begin. Next we will need a tool called Rufus which can be downloaded by clicking here, once you download it select your USB in the dropdown menu on Rufus
Step 2
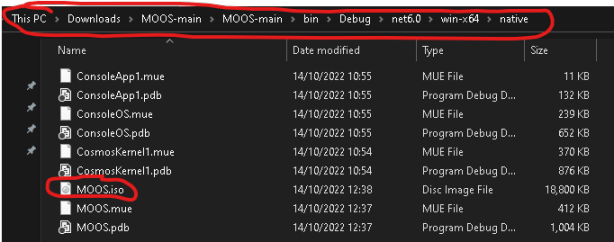
Once you've selected the USB on Rufus, you then want to locate the MOOS ISO, the ISO is located in the bin folder of the root of your MOOS Source Code, if you not have it that means you have not compiled MOOS, click here to learn how to build MOOS, in the bin folder, then in the image below you want to go to the folders in the tabbar until you find the file "MOOS.iso"
Step 3
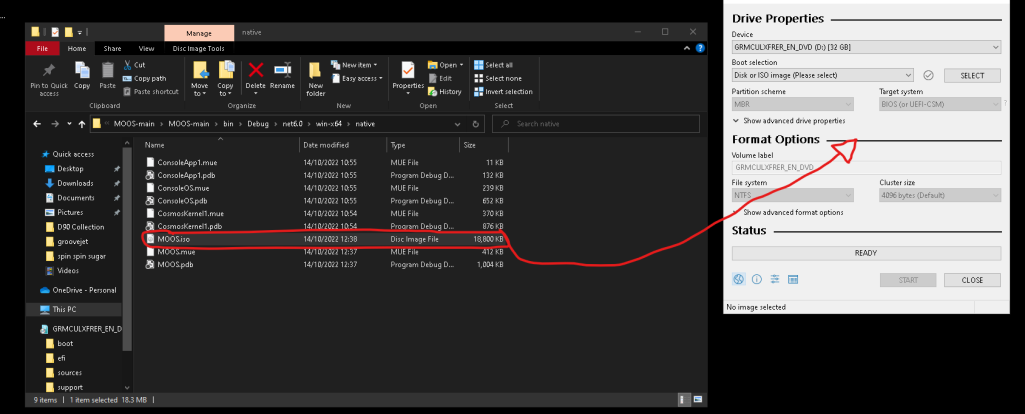
Now that we've located the MOOS Image, drag the MOOS Image to the rufus app, once done make sure Parition Scheme is set to MBR and Target System is set to BIOS(or UEFI-CSM), once done make sure the File System is set to FAT32, if you do not set the File System to FAT32 your BIOS may not recognise the USB, once your ready press "START"
Step 4
Once the MOOS Image has been flashed to the USB, we can now begin to boot MOOS starting off by finding out what manafacturer you PC is, and what it's BIOS or Boot Key is, to find out click here. Once you know what your BIOS Key is - in my case it is F2 for BIOS and F12 for BootMenu - we can turn our PC and go to the boot menu, to do so shut the pc off, hold whatever your BIOS key is, then keep holding the key and then turn the pc on, make sure to keep your finge on the BIOS Key. If you need help watch the video below
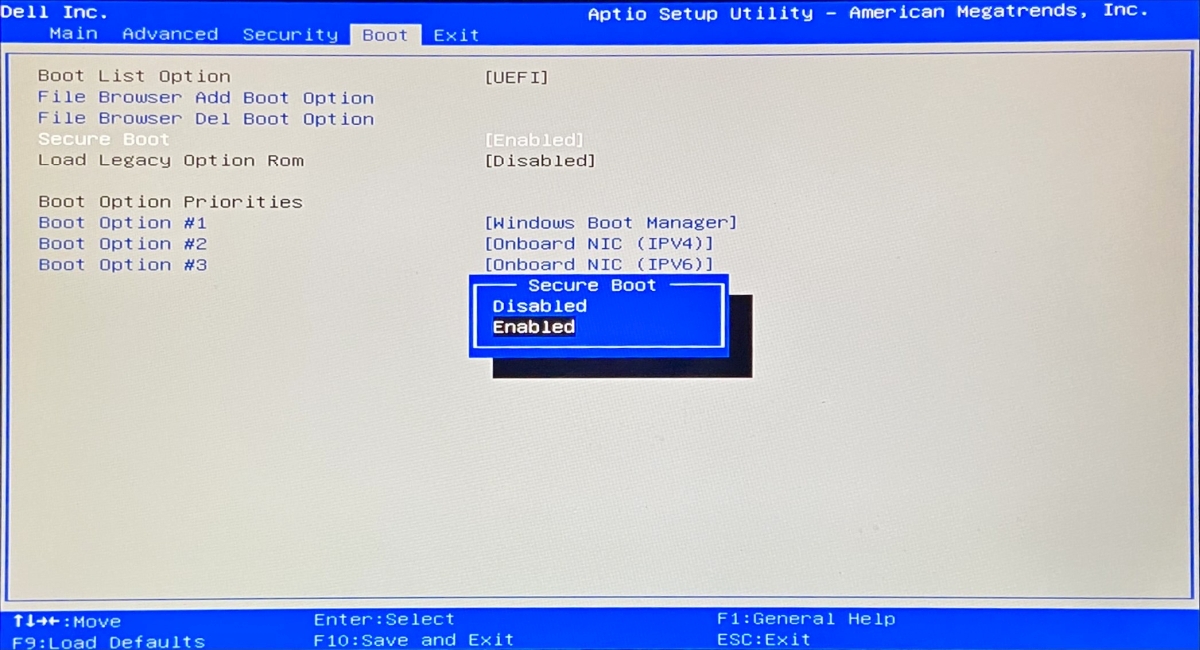
Step 5
Now that we are in the BIOS there are a couple of things we need to change, if you are unsure what your BIOS looks like, vising the BIOS Keys page and take a look at the reference images and see if your BIOS looks similar or the same to any of the images, if it doesn't feel free to contact nifanfa or me to make sure your in the BIOS, now that you are like mentioned before we need to adjust some settings, first off we need to set UEFI to Legacy in the Boot tab, once done go to the Boot tab and select your USB